SKP Help
SKP Help is more dynamic as it is working in a cloud environment where the changes made to this system are made live and active each week. There are no versions. Most of documentation’s steps are exactly the same as for SST. The steps are listed below:
-
Prepare the help content as described in the Documentation Process Overview. Only content approved by a PM or Dev should be added to the help.
-
Inform the Doc Team in the doc_checkouts Slack channel that you are going to check out the Help.
-
Synchronize your local repo develop branch with the remote develop branch and create a new branch.
-
Make updates within Flare and note them in your Author Notes.
NOTE: If you are making changes to the What's New topic and they are the first changes made in a month, you must add that month to the drop-down list that displays on the What's New page.
-
Merge your changes to the develop branch.
NOTE: Pushing content to develop automatically starts a build in jenkins called ‘CloudDocsDev’ to build the new content in the dev site. There is no need to access jenkins when updating SKP help (unless to check for failure issues).
-
When the changes are available on the develop site, ask for a peer review.
-
When the peer review is complete, merge the develop branch to the master branch to push the changes to the prod environment.
Synchronize your local repo develop branch with the remote develop branch and create a new branch
-
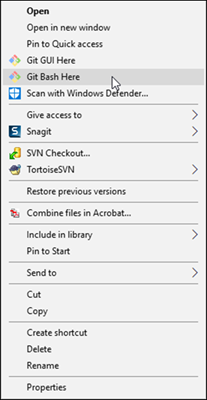
Right-click your local repo folder and select Git Bash Here from the drop-down menu to open the command prompt at that location.

-
Review the current branch, which appears in parenthesis at the end of the line. If you are not currently in the develop branch, switch to the develop branch by entering the git command git checkout develop.
-
Enter the git command git pull origin develop to synchronize your local copy of the develop branch with the remote copy.
NOTE: You MUST perform these steps before you make updates to ensure you are working in the latest copy of the develop branch.
- Enter git command git checkout -b <BranchName> to create a personal branch in which to make edits, where BranchName is a brief description of the branch.
-
Open the SKP help project in Flare and make updates.
Add Month to the Drop-down List on the What's New Page
If you are adding content to the What's New topic at the start of a new month, you must update the month option in the menu. Refer to Create Weekly SKP Release Notes for the process to build out each week's notes. Paste them by Friday of each week into this What's New Page.

To add a new month to the drop-down list:
-
In the Content Explorer, copy the SCReleases.htm file and rename it SCReleasesmmdd.htm.
-
Open the WhatsNew master page, and locate the code for the menu.

-
Add the menu option to the code by copying and pasting an option and updating it as needed.
-
Click Save.
Build a Target
These steps will build out the target so that the documentation may be viewed online in the dev or prod environments. A build may be run at any time, however, do not run a Publishas it will cause issues to the project.
To build a target in Flare:
-
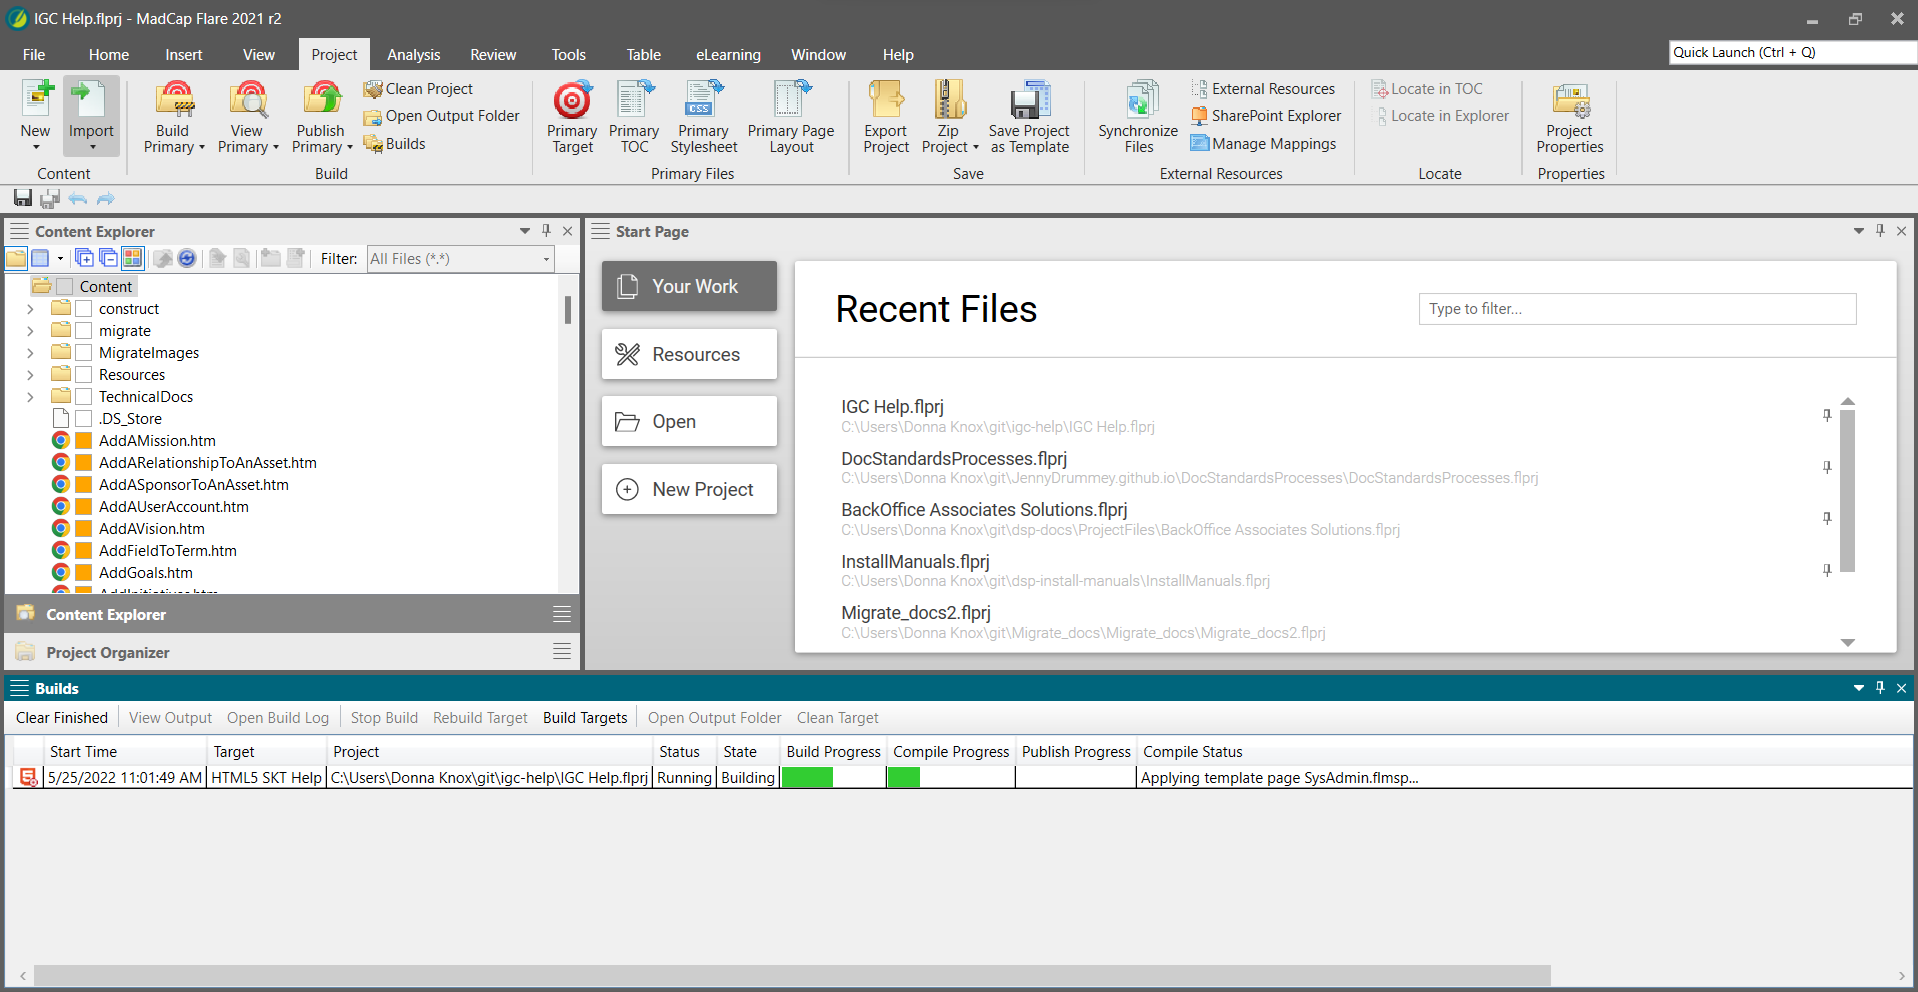
Within Flare, while viewing an open project, select the Project tab and click the down arrow on the Build Primary button to select HTML5 SKT Help.
-
A panel will display at screen bottom for this build showing the status and progression. Once complete, and successful, double click on the row to open for a view of the online help pages as they would display in a live setting.

Commit updates locally and push to remote
-
Return to Git Bash or open a new session.
-
Navigate to your repo, and make sure you are in the correct branch. It is in parenthesis after your prompt.
-
Enter the git command git status to see all of the changes you have made.
NOTE: All of the updated files’ paths will appear in red.
NOTE: If you do not see them, you may have forgotten to save or you are in the wrong branch.
-
Enter the git command git add . to stage your updates for commit.
NOTE: The file paths change from red to green after you stage them. Include the space and the period.
-
Enter the git the command git commit -m "commit message" to commit staged updates.
NOTE: Do not use special characters, like apostrophes, in message.
-
Enter the git command git push origin <BranchName> to push your updates to the remote repo.
-
Create pull request to merge BranchName into develop.
-
Post to the doc_checkouts channel in Slack requesting a peer review.
Merge the Develop Branch to the Master Branch
-
Go to GitHub.com and access the appropriate repo.

-
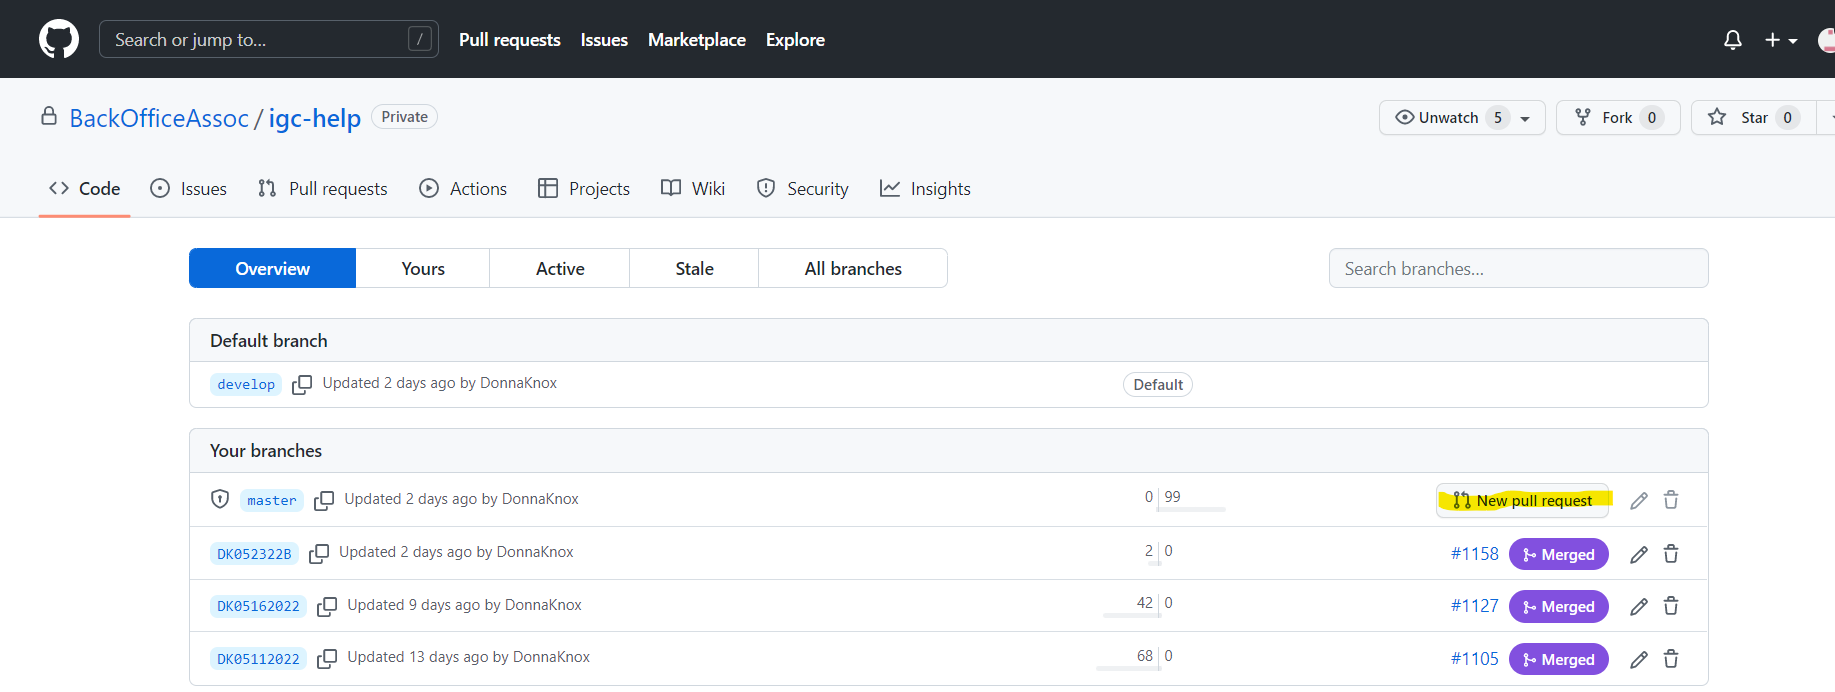
Within the Branches screen select the branch for master and click New Pull Request button.

-
The new pull request will default with the base: develop and the compare: master. Update both fields to base: master and compare:develop - in this way the develop is being pushed to the master as shown below.

-
Click the Merge then Confirm Merge buttons to complete this process. The master will now match the develop for igc-help project.
NOTE: Pushing content to master automatically starts a build in jenkins called ‘CloudDocsProd’ to build the new content in the prod site. There is no need to access jenkins when updating SKP help (unless to check for failure issues).
Perform SKP Help Peer Review
Follow the steps listed here.
