Update the Doc Team's Process and Standards
NOTE: You must be set as a collaborator on the JennyDrummey.github.io repo to access this project.
To update this help system (first time only), you must first clone the following repo: https://github.com/JennyDrummey/JennyDrummey.github.io.git
NOTE: GitHub Initial Setup contains the initial configuration and setup steps for Git and GitHub. These steps must be performed by a new employee.
NOTE: Always use Git Bash. Do not use the GitHub Desktop application.
NOTE: You MUST perform these steps each time you checkout a branch to ensure you are working in the latest copy of the release branch.
To update the process and standards:
-
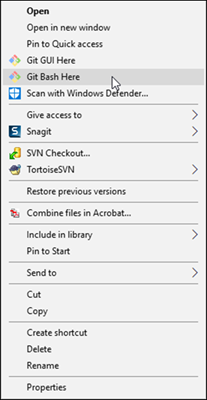
In Windows-Explorer, right-click your local repo folder and select Git Bash Here.

Right-click menu with Git Bash Here option
-
Enter the git command git checkout main
-
Enter the git command git pull origin main
NOTE: If at this point you wish to see a list of branches that are available in your local repo, enter the command git branch. All of the available local branches are listed.
NOTE: If you are working on a big project where you perform several checkins before opening a Pull Request, use the following commands each time you begin work: git status <your branch name> then git checkout <your branch name> then git pull origin <your branch name>
-
Enter the command git checkout -b <new branch name>
NOTE: Name the branch after the JIRA ticket number if applicable. Use the naming convention DTNNNN. If changes are not related to a Jira ticket, give the branch a meaningful name, such as ‘releasenotesupdates’.
-
Open the project in Flare and make your updates. Your updates are saved in the newbranchname.
NOTE: Refer to Update Online Help in Flare for steps on working in Flare.
-
When you finish your updates, save your changes and build the project.
-
Close Flare.
-

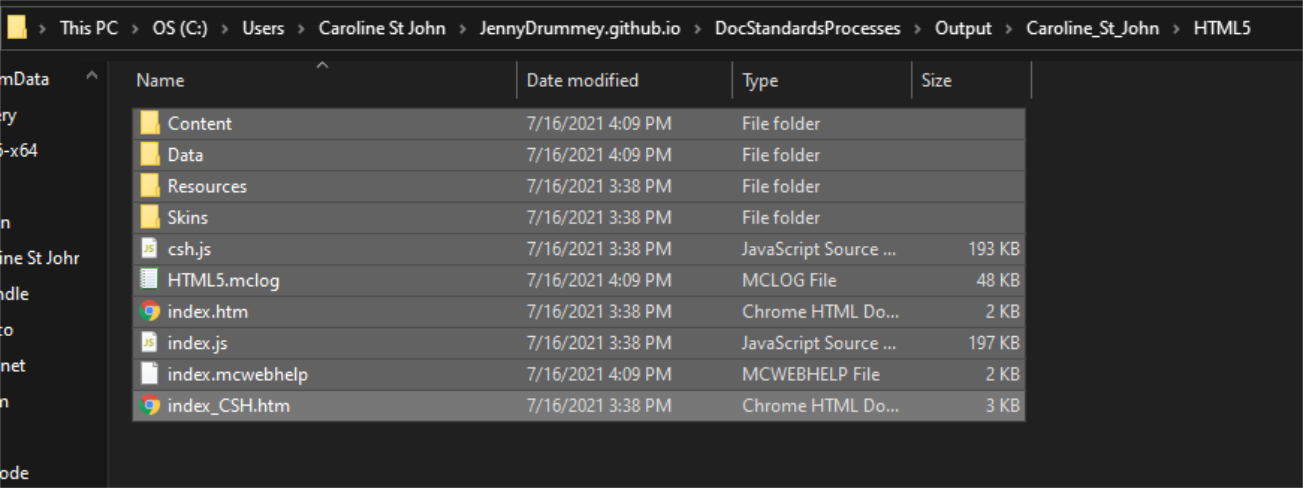
Navigate to the DocStandardsProcesses > Output > user name > HTML5 folder, and copy all of the contents.
-
Paste the contents into the root of the folder, overwriting any file issues.

Author Pushes Updates to github Repo and Merges Content to main
-
Return to Git Bash or open a new session.
-
Navigate to your repo, and make sure you are in the correct branch. It is in parenthesis after your prompt.
-
Enter the git command git status to see all of the changes you have made.
NOTE: If you do not see your changes, you may have forgotten to save or you are in the wrong branch.
-
Stage the updates for commit by entering the git command git add .
NOTE: Include the period in the command.
NOTE: Comments change from red to green after you stage them.
-
Commit staged updates by entering the command git commit -m "<commit message that informs everyone what you have done>"
NOTE: Do not use special characters in message.
-
Push your changes to the remote by entering the command >git push origin <new branch name>
-
Go to GitHub.com and click the Compare and pull request button next to your recently pushed branch.
-
Make sure the base is the main release branch and it is being compared to your new branch name.
-
Click the Create Pull Request button.
-
Scroll down and click the Merge button and the Confirm Merge button.
Once merged, the changes display at https://jennydrummey.github.io./Content/DocProcess/BOADocProcess_DSPDocOverview.html
